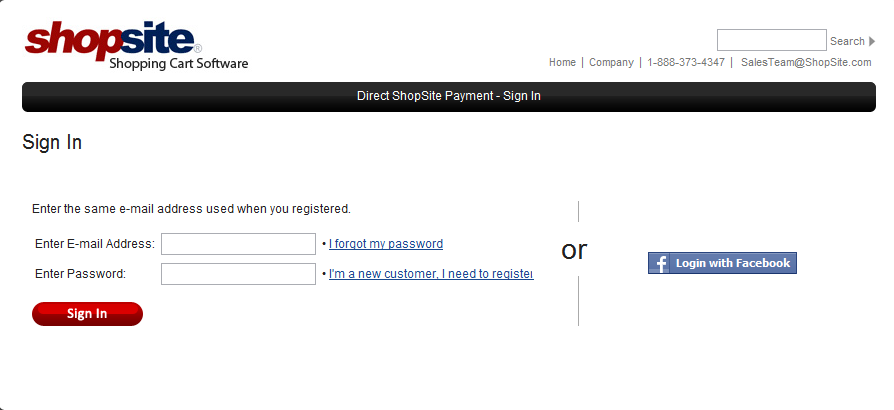
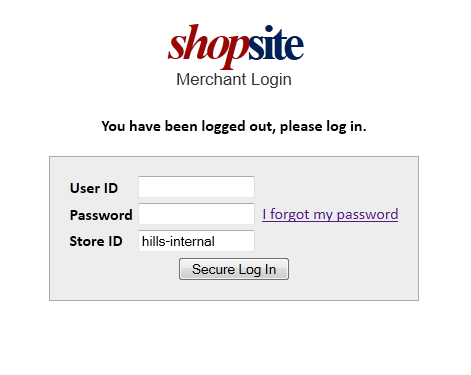
New ShopSite Login

In version 11, ShopSite began offering a new login mechanism.  In all previous versions of ShopSite, the login mechanism was provided by the web server. Using the web server had several advantages.  First, ShopSite did not need to develop a new login procedure since all web servers provided a login mechanism.  Second, because web server login is well known to web masters, if a merchant forgot their password, the server admin could easily create a new password for them.  And finally, sophisticated hosts could modify the web server login to integrate with logins for other systems thereby giving users a single login (or single sign-on) for ShopSite, their hosting account, and other services.

So why change ShopSite Login?  One reason is that the PCI Security Standards Council requires a more sophisticated login than most web servers support.  Some of the functionality required to pass an audit include:

  • Require a minimum password length of at least seven characters.
  • Use passwords containing both numeric and alphabetic characters.
  • Do not allow an individual to submit a new password that is the same as any of the last four passwords he or she has used.
  • Limit repeated access attempts by locking out the user ID after not more than six attempts.
  • Set the lockout duration to a minimum of 30 minutes or until administrator enables the user ID.
  • If a session has been idle for more than 15 minutes, require the user to re-authenticate to re-activate the terminal or session.
  • Change user passwords at least every 90 days

Since the web server is enforcing the merchant login, there was no easy way for ShopSite to enforce any of the above requirements.

Certainly, the above requirements make the new ShopSite Login more secure.  Additionally, while creating the new ShopSite Login (the new User Accounts feature), we added functionality.  For example, you now have an “I forgot my password” link on the login page.  Previously, if you forgot your password you would need to contact your host and have them reset it.  Now you can click the link and receive an e-mail with a link to reset your password.  Once you answer a challenge/validation question, you can reset your password yourself.

Another benefit with the new ShopSite Login is that a store can have multiple, unique, user logins.  Prior to User Accounts, if you had several employees that needed access to ShopSite, they would all share the same login id and password. With multiple user accounts, it is easier to track when any particular user has logged in and accessed orders.

With ShopSite Pro stores, we’ve further refined the individual user accounts with the concept of roles.  With the roles feature, you can restrict what a particular user can have access to.  The specific roles that you can assign are:

  • Administrator – access to all features
  • Order Processing – access to orders including payment details
  • Order Fulfillment – access to orders but not to payment details
  • Content Management – access to creating/modifying pages, products, etc.
  • Reports – access to reports.

You can assign one or more roles to each user.

As you can see, the new ShopSite Login can be very useful.  While we recommend using the new ShopSite Login, for the merchants or hosts that are comfortable with login the way it has been, ShopSite still supports web server login.  When you are ready to make the switch, just go to Utilities -> User Accounts and follow the setup wizard.  If your store is not sharing ShopSite program files (e.g. CGIs), at the end of the wizard you will be prompted to remove the web server login (which you should do.)  If you enable User Accounts, but do not remove web server login, you will be prompted to login twice – first by the web server, and then by ShopSite.  If your store is sharing the program files with other stores (e.g. in a mall setup), you will not be prompted to disable the web server login, since doing so would affect all merchants in the mall.

One final note, whether you are using web server login or ShopSite Login, if your store supports SSL (e.g. https://), ShopSite will use this more secure method throughout the back office (merchant interface), and not just when viewing orders or sensitive configuration information.


Configure Google Analytics in ShopSite

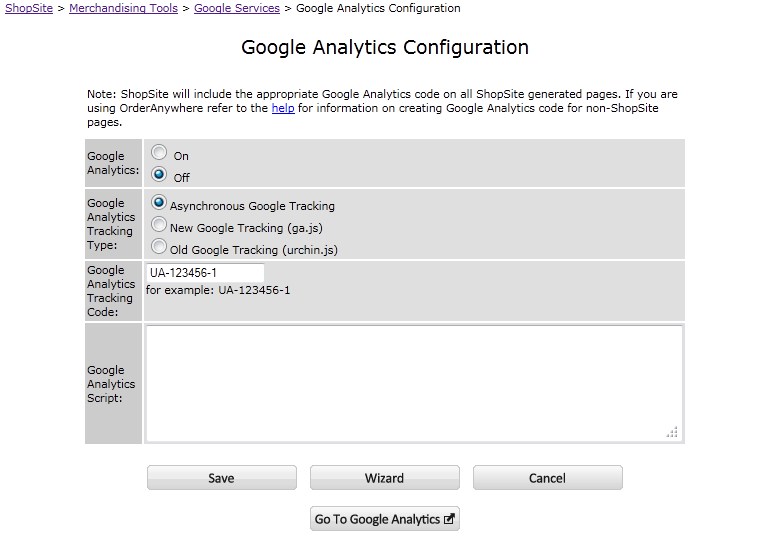
Last time, I covered why ShopSite made the switch to use Google Analytics for Traffic Reports.  This time, I’ll cover setting up Google Analytics within ShopSite.  First, go to Merchandising Tools > Google Services > Google Analytics, where you’ll see the following:

If you don’t have a Google Analytics account, click the “Wizard” button to start the configuration wizard and ShopSite will walk you through the steps.  Alternatively, you can watch this video tutorial.

Once you have your Google Analytics account, you can find your tracking code on your Website Profile page.  The account tracking code looks something like UA-123456-1.  Returning to ShopSite’s Google Analytics page, select the radio button to enable Google Analytics, select “Asynchronous Google Tracking,” paste your account tracking code in the “Google Analytics Tracking Code” field, and then save the configuration.  Publish your store to add the code to all of your ShopSite generated pages, including the shopping cart pages, and that’s it!

Google Analytics was originally a product from a company called Urchin, hence the original tracking type “old Google Tracking (urchin.js).”  While we’ve included it there for legacy support, you shouldn’t ever need to choose that setting.  The same is true for the “New Google Tracking (ga.js)”.  “New” is a bit of a misnomer, as it has already been replaced by the “Asynchronous Google Tracking” type.  If you select “New Google Tracking,” the entire web page with the tracking JavaScript code must load before the page is displayed to the user.  This is why designers would put the Google Tracking code as the very last thing on a web page.  The Asynchronous Tracking code solves this problem by allowing the web page to be displayed while the JavaScript code is loaded in the background.

If you have web pages that are generated outside of ShopSite, you will need to manually place the appropriate JavaScript code on each page.  You can get this code from the Google Analytics site or ShopSite can generate it for you and display it in the “Google Analytics Script” box.

Google Analytics integration is available in Pro and Manager service levels of ShopSite.  Starter merchants will need to get the code directly from Google and manually place it in their store pages and in the header or footer of their Shopping Cart pages.

Why ShopSite Traffic Reports has Moved to Google Analytics

ShopSite first integrated with Google Analytics with ShopSite Pro v8.2 back in 2007.  More recently, that functionality was introduced to ShopSite Manager in v10.  Even though ShopSite supported Google Analytics for tracking web site traffic and analysis, ShopSite also had its own limited site traffic reports that a Manager or Pro merchant could use.  Now with ShopSite v11, the reporting feature has been rewritten to focus on sales tracking and analysis; site traffic for new installations will be tracked exclusively via Google Analytics.  So why the switch?

First, I should note that almost all web servers have the ability to log access made to each web page and to every image accessed on that web page.  It is this web server-generated log file that ShopSite read and pulled data from to generate the reports.  The advantage to this is that you can get real-time data, since the instant a user views a page, it is logged by the web server.  The disadvantage to this method of reporting is that, for heavily trafficked sites, the log files can become so large and unwieldy that it would take ShopSite a long time to read and compile the data.  Also, when the web server’s logs do get large, they are often automatically rotated (e.g. compressed and archived), making them unreadable to ShopSite.  If you did not view the ShopSite report before the log file was rotated, that data would never be entered into ShopSite’s traffic report. Also, there are some web servers that store the logs in a location inaccessible to ShopSite, making it impossible to report.

Google Analytics, in comparison, works by placing a small piece of JavaScript code on every page to be tracked.  When a user views the page, the JavaScript code executes and logs the access on Google’s server.  Besides storing the data on Google’s server and not taking up additional space on the merchant’s server, Google has many tools for analyzing the data.  From straight numbers to graphical charts, Google Analytics is incredibly feature-rich.  It tracks and displays more information than ShopSite’s site reports, such as which countries visitors are coming from, which browsers and OSes they are using, search engine keywords they may have used to find the site, mobile access to the site (including device type), as well as average time on the site, bounce rate, and so forth.  The one disadvantage is that Google does not give you real-time data.  Instead, the data is usually a day behind (up to date for the previous day and earlier.)

Google Analytics is free and powerful.  Instead of trying to duplicate exisiting Google Analytics features, we decided to improve the Sales reporting.  For stores that upgrade, the old site traffic reports are still available if the merchant does not want to make the switch to ShopSite’s new reports.  But I bet that most will want to use Google Analytics and ShopSite’s new Sales reports.

Next time I’ll cover Configuring Google Analytics in ShopSite.


ShopSite Online Shopping Cart Software BlogShopSite Online Shopping Cart Software On YouTubeShopSite Online Shopping Cart Software On TwitterShopSite Online Shopping Cart Software On FacebookQuestions?888-373-4347E-commerce Blog